 |
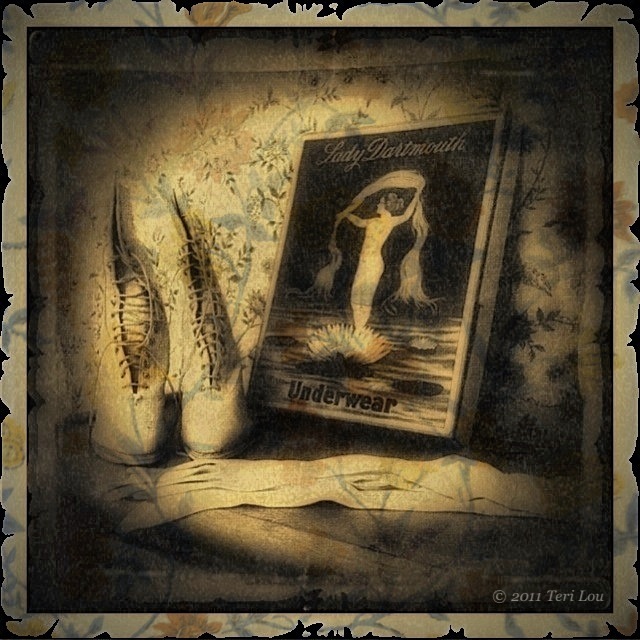
| Another image from the Perkin House, Colfax, WA |
Today's image was a surprise to me. From the beginning of the processing procedure, I decided I wanted to create an old photo feel, so instantly the app OldPhotoPro came to mind. (As always I sharpened the image first before applying any additional filters.) While finding that app I came across the app PhotoTreats and decided to remind myself to what was available there. I found a filter that super saturated the image and decided to apply it before bringing it into OldPhotoPro.
In OldPhotoPro I tried some various combination and instantly feel in love with the ragged frame. Even though the frame did add the appeal I was looking for I also wanted to continue playing with the possibilities of different framing options so I opened the image in fxPhotoStudio and added a thin black frame. I brought the image into OldPhotoPro again to add the ragged frame to the black portion.
Now with the thought of wanting to paint in the wall paper textureas part of the frame, I also captured that day, I once again added a frame in fxPhotoStudio but this time in white and wider so it would show through when blended in the app Blender.
Each time I processed the image in OldPhotoPro it became more aged and darker. I definitely liked the aged look but thought it was too dark so I used the app DynamicLight to brighten it a bit. Next I sharpened the image again using Perfect Photo. Then I was ready to blend. Using the simplest blending mode app, Blender, I opened the most current version and the wallpaper texture. My plan, as I stated earlier, was to paint the wallpaper just into the frame, however when I chose the multiply option I just loved how the wallpaper blended so well into the whole image - Surprise!
Even though I loved the look on the wallpaper on the image, I didn't want it to be as strong as the portion on the frame so next I opened the image with the blended wallpaper and the one just prior to that in Filterstorm and with a very low opacity brush lightened the inside of the image.
As always I added my copyright watermark with Impression.
This is just a concept that I wanted to share with all of you. It can be used in several ways. I hope this demonstration and explanation motivates and inspires you to see what is possible. I have many more lessons like this in my iCreativity course that is starting Tuesday May 31st.
For the step by step images I used the app Diptic.
| original Hipsta Dream Canvas, OldPhotoPro, fxPhotoStudio, OldPhotoPro |
| FxPhotoStudio, OldPhotoPro, DynamicLight, Filterstorm |
iPhoneography Classes Available Now! - next class starts May 31st. If you would like to learn how to capture and process iPhone images beyond a basic snapshot take an Online iPhoneography Course with Teri Lou. Two courses are available iPhoneography 101 and iCreativity. Click on the direct links in the upper left hand column of this blog for information, pricing and schedule.

No comments:
Post a Comment
What do you think?